-
Guxiang Town, Chaozhou City,Guangdong Province, China
How to Install a Smart Toilet: Step-by-Step Guide with Video
How to Install a Smart Toilet?
Smart toilets have evolved from luxury accessories to must-have fixtures in modern high-end bathrooms, designed to provide convenience, hygiene, and automation. Understanding how to install smart toilet systems is essential for international distributors, builders, and developers to ensure smooth deployment in hospitality, commercial buildings, and healthcare environments.
This guide from Vleeo Smart Toilet, a trusted Chinese factory and OEM/ODM partner, provides a detailed overview of the installation process, technical requirements, and practical advice for large projects.
Why “how to install a smart toilet” is crucial
According to the International Building Code Association (IBC), 75% of smart toilet failures stem from improper installation. The correct installation process can ensure:
- Extend the service life of the equipment (an average of 3-5 years)
- Ensure user safety (especially electrical and waterproof performance)
- Maintain optimal functional performance (such as water pressure stability)
- Avoid warranty expiration (most brands require professional installation)
If you’re planning how to install smart toilet systems in bulk, getting this right saves money, time, and future repair costs.
Pre-installation checklist
1. Infrastructure assessment
- Water supply system: Detect static water pressure (recommended 0.1- 0.5MPa)
- Drainage pipe: Measure the diameter of the sewer pipe (standard is Φ100mm or Φ110mm)
- Circuit configuration: Confirm GFCI protection socket (≤1.2 meters away from the equipment)
2. Space planning points
- Floor-standing type requires ≥60cm operating space (refer to [Americans with Disabilities Act] ADA standard)
- Wall-mounted type requires a load-bearing wall (single-point load-bearing ≥400kg)
- Please pay attention to our [Bathroom Space Planning Guide] for detailed size requirements
3. Model matching suggestions
| Model | Applicable Scenario | Installation Complexity |
| CL-626 | High-end commercial venues | ★★★★ |
| CL-K1 | Home renovation projects | ★★ |
| CL-613 | Bulk engineering projects | ★★★ |
Key:
- ★★ = Moderate difficulty
- ★★★ = Challenging
- ★★★★ = Professional installation recommended
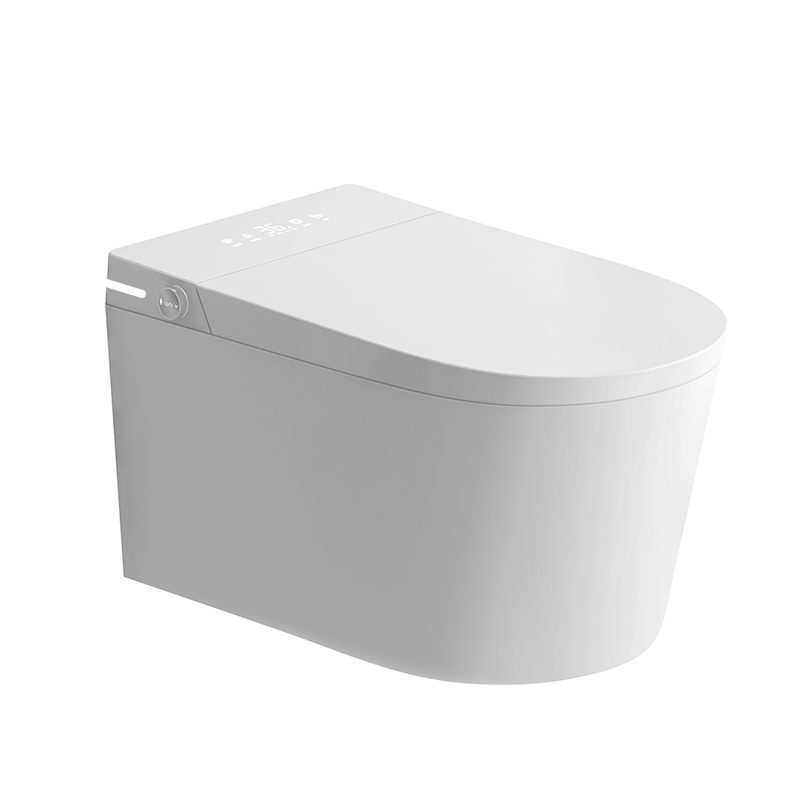
These considerations will affect product selection. For example, the CL-613 smart toilet has a floor-standing design with dual flush and automatic cleaning functions, while the CL-K1 seat model is a retrofit option connecting to an existing toilet.
Professional tool kit preparation
Vleeo Technical Director recommends preparing:
- Plumbing tools: torque wrench (20-25N·m), pipe pressure tester
- Electrical equipment: non-contact voltage detection pen (Fluke brand recommended)
- Auxiliary materials: silicone-based sealant (NSF 61 certified), 304 stainless steel flange bolts
Some high-end models, such as the Premium CL-626, come with a complete installation kit.

Types of smart toilets
Integrated Smart Toilets
- Complete system with bidet, seat heater, automatic flush, etc.
- Requires electrical and plumbing installation
Smart Toilet Seat
- Mounts on top of the existing toilet
- Great for remodels or small upgrades
- CL-K1 is a typical model
Wall Hung Toilets
- Requires an in-wall tank system
- Great for space-saving designs ( example CL-622 )
Floor-mounted Toilets
- The most common and easiest to install
- Compatible with standard bathroom layouts
Choosing the right type affects how to install smart toilet equipment efficiently.
Step-by-Step Guide: How to Install a Smart Toilet
Floor-Mounted:
1. Shut off the water supply
Turn off the valve behind the existing toilet and flush to empty the tank.
2. Remove the old toilet
Unscrew the bolts, disconnect the water supply, and remove the toilet. Clean the flange and remove any wax residue.
3. Inspect the flange and water inlet
Make sure it is compatible with the drain and inlet dimensions of the new smart toilet.
4. Position the smart toilet
Align it with the floor bolts and flange. Use a wax ring or gasket to seal.
5. Secure the toilet base
Tighten the floor bolts and caulk the base for stability and waterproofing.
6. Connect the water supply
Use a braided hose to connect the toilet to the shutoff valve. Make sure it matches the thread size.
7. Connect the power supply
Plug the unit into a nearby GFCI outlet. Avoid using extension cords in wet areas.
8. Test all functions
Activate each smart function (flush, bidet, seat warmer, dryer, etc.) to confirm proper functionality.
Wall-mounted
Wall-mounted units require:
- Front wall system (e.g., in-wall reservoir)
- Reinforced wall structure
- Concealed drain
- Advanced planning for pipe placement
Installation steps:
- Mount the bracket
- Connect the drain and water inlet
- Mount the bowl
- Finish the wall
- Connect the power supply
- Install the flush panel
This process is more advanced. Knowing how to install smart toilet wall models correctly can improve long-term durability and aesthetics.

Electrical Setup: Voltage, GFCI, and Wi-Fi Requirements
- Smart toilets must be plugged into a GFCI outlet (ground fault circuit interrupter)
- Verify voltage compatibility: some models operate at 110V, others at 220V
- Use waterproof outlets and avoid exposed wires
- Models with app pairing or remote controls may require a Wi-Fi connection
Models with smart features demand both safety and connectivity. It’s critical to understand how to install smart toilet wiring properly to avoid risks.
Water Supply and Pressure Requirements
Smart toilets require a consistent flow of water to operate flushing and bidet functions.
- Ideal Pressure: 0.07 MPa to 0.75 MPa
- Pipe Size: Typically 1/2-inch water inlet
- Make sure each unit has a separate shutoff valve in commercial projects
Stable water flow is key for flushing and bidet systems. This is a technical detail often missed when planning how to install smart toilet systems in bulk.
Remote Control, App, and Smart Feature Setup
Advanced Smart Toilet Includes:
- Bluetooth or Wi-Fi Pairing
- Smartphone App Control (Temperature, Water Pressure, etc.)
- Voice Assistant Integration (Alexa, Google Assistant)
See Owner’s Manual for Pairing Instructions. Always update the firmware (when available) to enhance functionality.
Common Installation Mistakes
Insufficient Water Pressure→ Install Booster if Needed
Improper Flange Leveling→ Use Leveling Tool and Shims
No GFCI Protection→ May Void Warranty and Create a Hazard
Outlet Too Far Away→ Rewire or Install New Outlet; Do Not Use Unsafe Extensions
Backward Water Connection→ Always Check the Directional Flow Indicator on the Hose
Avoid these when managing how to install smart toilet systems at scale.
Bulk Installation in Hotels, Hospitals, and Multi-Unit Buildings
For Projects with 50+ Units:
- Coordinate Plumbing and Electrical Layout in Advance
- Use an Installation Team Trained on the Specific Model
- Arrange for Bulk Testing and Calibration
- Include Extra Units or Parts for Field Replacement
Vleeo offers installation training, technical videos, and white-label documentation for B2B customers. Contact us for details.
Professional vs. DIY about How to Install a Smart Toilet
| Criteria | DIY | Professional |
| Speed | Slower | Faster |
| Cost | Lower | Higher |
| Warranty Risk | Higher | Lower |
| Complexity Handling | Limited | Full coverage |
If you’re planning how to install smart toilet products for a large site, professional installation is highly recommended.
FAQ about How to Install a Smart Toilet
Q: Can I install a smart toilet myself?
A: Basic models (such as CL-K1) can be DIY, but for high-end models, it is recommended to contact the [Vleeo certified installation team] to get technical support.
Q: Do smart toilets require plumbing?
A: Yes, they need a water inlet and a drain outlet – just like a traditional toilet.
Q: How long does it take to install?
A: 1-2 hours for floor-standing units; longer for wall-mounted units.
Q: What should I do if an error occurs after installation?
A: Usually, it is abnormal water pressure, refer to [Fault Code Manual] for troubleshooting. Vleeo provides a full FAQ for occur codes.
Q: How to ensure compatibility for overseas projects?
A: Vleeo smart toilet models all meet international certification standards and provide customized services by region.
These answers are essential if you’re researching how to install smart toilet systems across global project sites.
Partner with Vleeo for Installation Support
Vleeo Smart Toilet offers:
- Customized installation manual (EN/FR/ES/AR/CN)
- Pre-configured voltage and accessories
- Spare parts kit for every order
- OEM branding on the control panel and remote control
- Pre-sales and after-sales support
Explore our products:
Ready to Install Smart Toilets at Scale?
Contact Vleeo Smart Toilet — China’s leading manufacturer of smart toilet systems. We provide tailor-made B2B solutions for international partners:
- Custom branding
- Flexible MOQ
- Fast production and shipment
- Global technical support